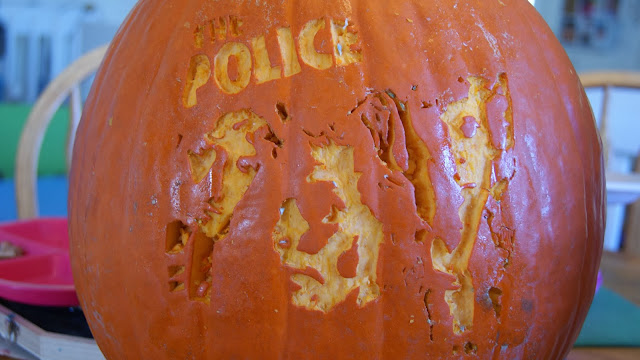
For years I pinned, taped, even begged the stencil to stay put. Then, if I had magically transferred the pattern perfectly and figured out the maze of holes, I couldn't put any weight onto the pumpkin for fear of braking it. There had to be a better way!
Here you will learn my EZ Pumpkin Carving technique. Print the stencil, spray the back of it with spray adhesive, glue it on the pumpkin, carve, THEN gut the pumpkin.
Stencil
Make two copies. One is used as a stencil, the other as a reference
Solid gray you cut out
Lined gray you scrape
White you don't touch
Tools that You will need
Thin saw
Wood Carving Tools
Spray Adhesive
Glue the stencil onto the pumpkin
Thin saw
Wood Carving Tools
Spray Adhesive
Glue the stencil onto the pumpkin
Wood Carving Tools
Spray Adhesive
Glue the stencil onto the pumpkin
Spray Adhesive
Glue the stencil onto the pumpkin
Glue the stencil onto the pumpkin
Spray the back of the stencil and stick it onto the pumpkin
Keep on playing with it so you have the lest amount of wrinkles
Cut Out The Solid Gray
Use The Wood Carving Tool/Knife To Outline The Lined Gray Areas
Useing A Wood Carving Tool Scrap The Lined Gray Areas
Cut The Lid
Gut The Pumpkin
Thin the inside of the pumpkin
Pin On Pinterest


.JPG)


No comments:
Post a Comment